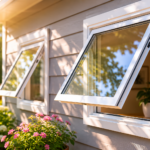
If you’re installing new windows or changing up your home’s color scheme, you’ll most likely have to paint window trim. A crisp and clean paint job will accentuate your windows, whereas messy and chipped paint can ruin the look and take away from your home’s value.
There are a few hacks that can make the task of painting your windows easier and give you better results. Doing a job that looks professional without the price tag isn’t as hard as you’d think. Here are our recommended four P’s (Planning, Prepping, Painting, and Perfecting) to ensure your paint job is flawless and long-lasting.
The First P: Planning Your Window Trim Painting Project
Successful window trim painting starts with smart planning. Timing, weather conditions, and project scope all affect your results and experience.
Choosing the Right Time
If you’re painting your indoor trim, you can plan for a day that suits your schedule best. Interior painting offers maximum flexibility since you control the environment. Plan for good ventilation by opening windows (not the ones you’re painting) and using fans to circulate air and speed drying.
For outdoor trim, however, there is less flexibility. You’ll need to make sure it is a good temperature outside for both you and the paint. Frigid fingers make for unsteady hands and uncomfortable work conditions. Hot weather dries your paint too quickly, causing lap marks, brush strokes, and adhesion problems.
The ideal temperature to paint outdoors is about 50 to 80 degrees Fahrenheit. Most paint manufacturers specify temperature ranges on their labels. Follow these guidelines closely for best results.
Additional Planning Considerations
Weather Forecast: Check the extended forecast. You need dry conditions not just during painting but for 24 to 48 hours after to allow proper curing. Rain on fresh paint ruins the finish and wastes your effort.
Sunlight and Shadows: Direct sunlight causes paint to dry too quickly. Plan to paint sections in shade or during morning/late afternoon hours when the sun isn’t directly hitting the trim.
Project Scope: Estimate how much trim you’re painting. Measure linear feet and calculate paint quantities. Most exterior trim paint covers 350 to 400 square feet per gallon. Buy slightly more than calculated to avoid running out mid-project.
Time Allocation: Interior trim typically takes 4 to 6 hours for an average room (prepping, painting, and cleanup). Exterior trim on a whole house might require 2 to 3 full days. Don’t rush the timeline; it leads to poor results.
The Second P: Prepping Your Window Trim for Paint
Preparation determines paint longevity more than any other factor. Skipping or rushing prep work guarantees premature failure.
Removing Old Paint
To start, make sure that your window trim is a smooth, blank canvas. Using a paint scraper, remove any previous paint and smooth out the surface. Flaky paint remnants will undoubtedly cause your new paint to chip off easily and shorten its lifespan.
Paint Removal Techniques:
For Minimal Flaking: Scrape loose areas with a sharp putty knife or paint scraper. Sand smooth with 80-grit sandpaper, then finish with 120-grit for a smooth surface.
For Extensive Peeling: Use a heat gun to soften thick paint layers, making removal easier. Hold the heat gun 6 to 8 inches from the surface, moving constantly to avoid scorching wood. Scrape softened paint immediately while still warm.
For Lead Paint (Pre-1978 Homes): Test for lead using a home test kit available at hardware stores. If positive, follow EPA lead-safe work practices or hire certified professionals. Never sand or heat-gun lead paint without proper precautions, as lead dust is extremely hazardous.
Repairing Trim Damage
If your trim is newly installed, you might have little divots where it was nailed in. Use wood filler to fill the holes, let it dry, and then sand it flat. You might need to do additional sanding to the trim to make sure it has a smooth, even surface before applying your window trim paint.
Repair Checklist:
- Fill nail holes and small gaps with wood filler or painter’s putty
- Repair split or cracked wood with wood glue and clamps
- Replace rotted sections (paint won’t fix structural damage)
- Check for loose trim and re-secure with finishing nails
- Let all filler dry completely (follow product instructions, usually 2 to 4 hours)
- Sand-filled areas flush with surrounding surface
Cleaning and Final Prep
Once all the old paint is removed or the sanding is completed, use a towel and household cleaner to remove dust, debris, and anything else on your trim’s surface that will ruin the texture of your new paint.
Thorough Cleaning Process:
- Vacuum or brush away sanding dust
- Wipe with damp cloth and mild detergent solution
- Rinse with clean water
- Allow to dry completely (minimum 2 hours, preferably overnight)
- Check for any missed damage or imperfections
Caulking Critical Gaps
Remember to caulk exposed seams and gaps in the window trim. Caulking serves dual purposes: creating clean paint lines and weatherproofing against moisture infiltration.
Where to Caulk:
- Gaps between trim and siding or house wall
- Joints where two trim pieces meet
- Seams between window frame and trim
- Any cracks or separations in the wood
Caulking Tips:
- Use paintable acrylic latex caulk for exterior applications
- Cut caulk tube tip at 45-degree angle for smooth beads
- Apply steady, even pressure for consistent bead width
- Smooth with wet finger or caulk tool immediately after application
- Allow caulk to dry completely before painting (check product label; usually 2 to 24 hours)
Proper window maintenance and preparation ensure your paint job lasts for years rather than months.
The Third P: Painting Your Window Trim Like a Professional
It’s time for the main event: painting your window trim! Following proper technique ensures smooth, even coverage and professional-looking results.
Masking and Protection
Unless you are a seasoned painter with a steady hand, you’ll probably need to prep to make sure the window trim paint doesn’t stray onto your wall color or window glass.
Use painter’s masking tape to cover up the area around the trim with strips that are about the length of your forearm. Align the tape with the edges of your window trim and around the inner edges as well. This won’t prevent all paint from landing where it doesn’t belong, but it’ll greatly increase accuracy and shorten your cleanup time. The masking tape will help you create even lines and add that professional-looking precision.
Masking Best Practices:
- Use quality painter’s tape (cheaper tape bleeds or pulls off paint)
- Press tape edges firmly to prevent paint seepage
- Don’t leave tape on more than 24 hours (becomes difficult to remove)
- Mask window glass about 1/16 inch from trim edge
- Cover surrounding surfaces with drop cloths or plastic sheeting
Priming for Success
Start by adding a coat of primer to your window trim. Primer serves crucial functions: sealing porous wood, blocking stains, improving paint adhesion, and reducing top coat requirements.
When Primer is Essential:
- Bare wood (new or stripped trim)
- Previously stained wood
- Heavily patched areas
- Switching from dark to light colors
- Exterior trim exposed to weather
When Primer May Be Optional:
- Repainting similar color over sound existing paint
- Using high-quality paint-and-primer-in-one products
Allow primer to dry completely before top coating (usually 2 to 4 hours; check product label).
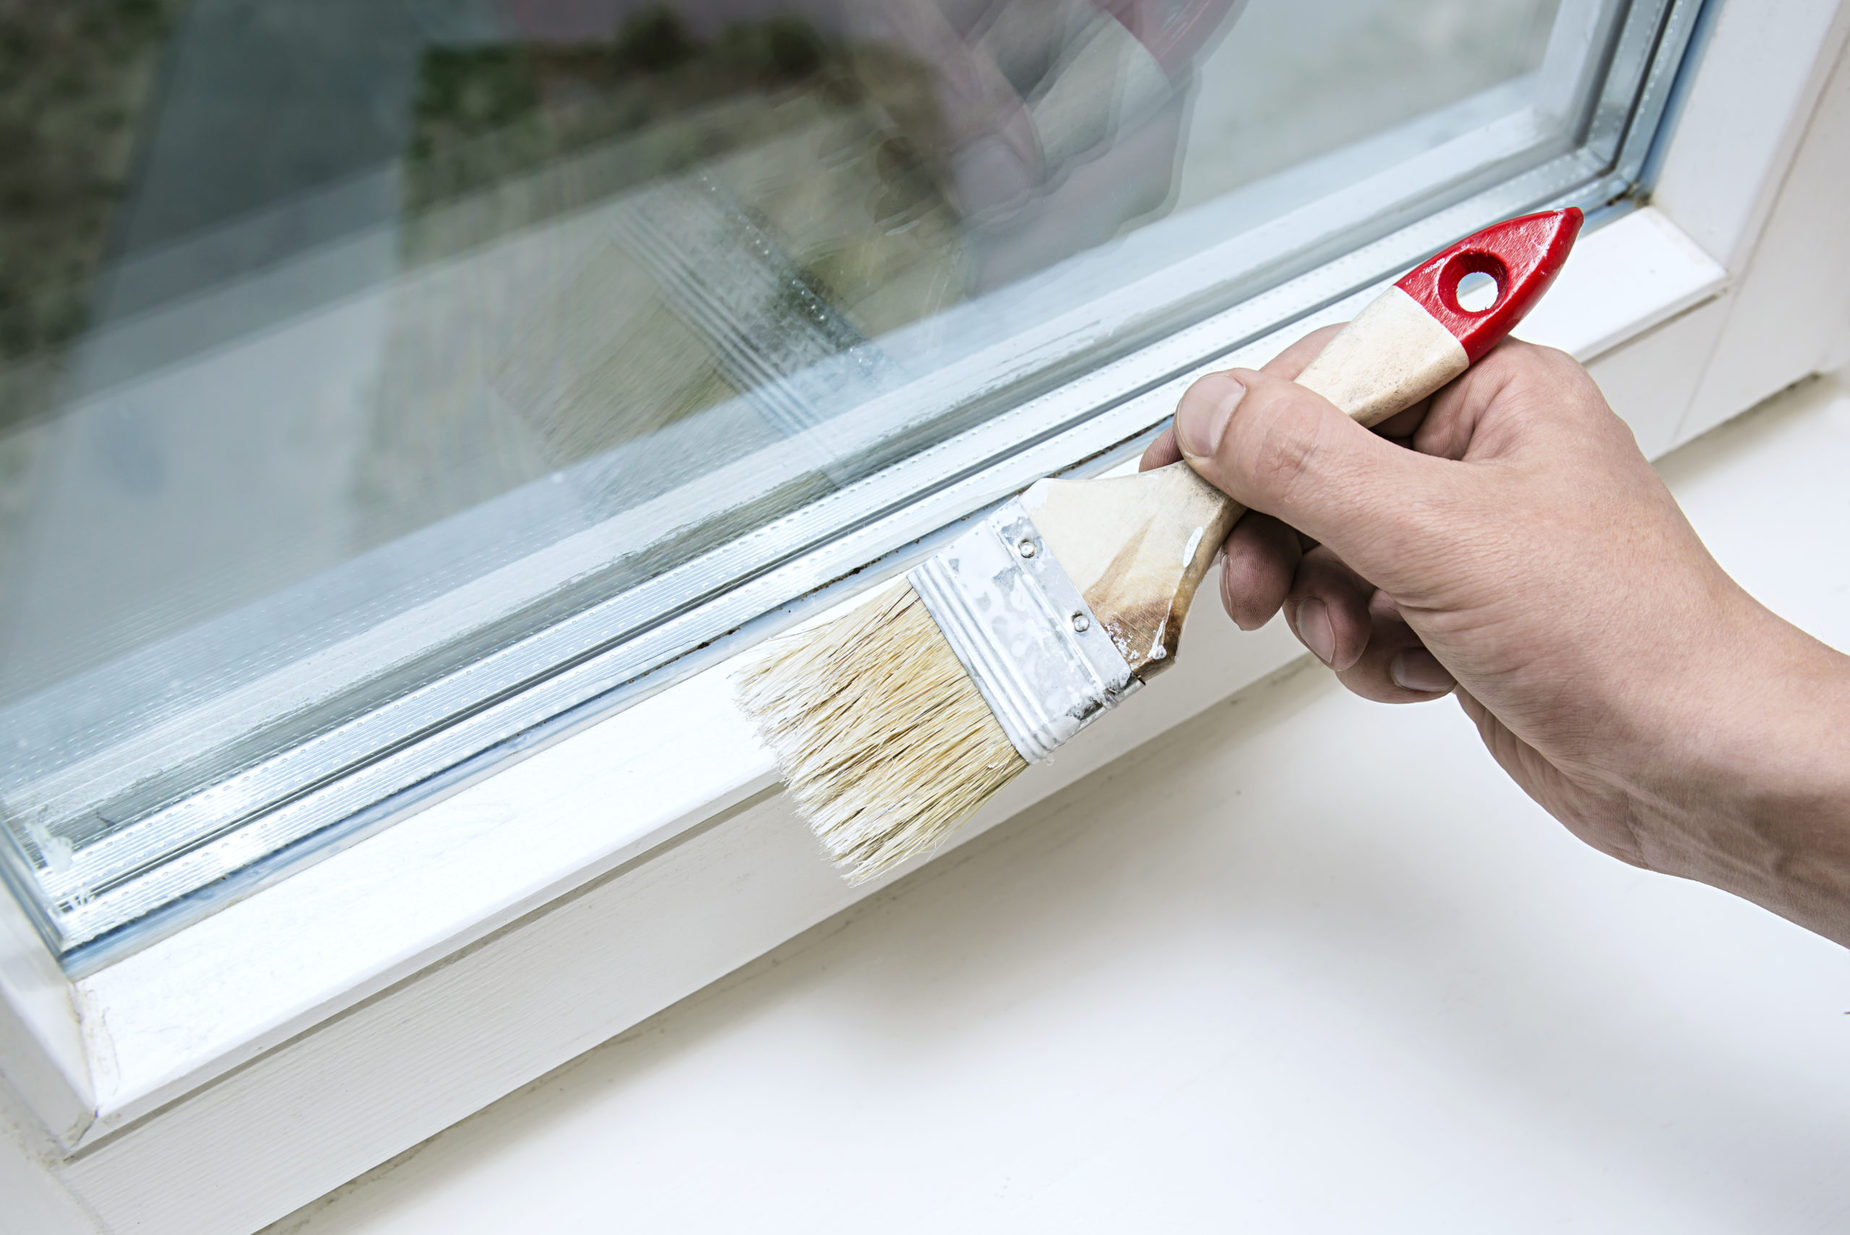
Applying Top Coats
Once that first coat is dry, you can begin adding your main coat. One to two layers is the perfect amount of paint. Any more and it may start to look goopy; any less and it’ll end up looking faded and providing inadequate protection.
Application Technique:
Brush Selection: Use a quality 2- to 2.5-inch angled sash brush for trim work. Quality brushes hold more paint, create smoother finishes, and don’t shed bristles.
Painting Order: It’s best to start by painting the trim closest to the window so you can avoid smudging the wet paint during the job. Work from interior edges outward, maintaining a wet edge to prevent lap marks.
Brush Technique:
- Dip brush about one-third into paint
- Tap (don’t wipe) excess on can rim
- Apply paint with smooth, even strokes
- Don’t over-brush (causes drag marks and poor coverage)
- Feather edges into previously painted sections
Drying Between Coats: Allow the first coat to dry according to label instructions (typically 2 to 4 hours) before applying the second coat. Rushing causes lifting and marring of the first coat.
Color and Finish Selection
Matching your color to the rest of your windows helps create unison and pulls together your home’s color scheme. Use a glossy paint to keep it looking fresh longer. Gloss and semi-gloss finishes resist dirt, moisture, and mildew better than flat or satin finishes, making them ideal for trim exposed to weather and cleaning.
Finish Options:
- High-gloss: Maximum durability and washability, very reflective
- Semi-gloss: Good durability and moisture resistance, slight sheen
- Satin: Moderate durability, low sheen (better for interior trim)
For exterior trim, choose exterior-grade paint formulated to withstand UV exposure, moisture, and temperature extremes.
Interior vs. Exterior Trim: Important Distinction
Painting your interior window trim is a good way to improve the overall appearance and update your home’s look. Interior trim painting is relatively straightforward and forgiving.
We recommend capping the exterior window trim because it requires less maintenance and extends the lifespan of your window trim. Window capping refers to the application of aluminum cut and formed with a brake to fit over the exterior wood trim of a window.
Why Capping Beats Painting for Exterior Trim
Maintenance-Free: Aluminum capping never requires repainting, scraping, or refinishing. Initial investment pays off through eliminated maintenance costs and labor.
Superior Weather Protection: Aluminum sheds water perfectly, preventing rot, warping, and moisture damage that plagues painted wood trim.
Longevity: Properly installed capping lasts 30 to 50 years with zero maintenance versus painted trim requiring repainting every 5 to 7 years.
Appearance: Capping maintains a crisp, clean appearance indefinitely. Painted trim gradually degrades, requiring constant attention to maintain curb appeal.
Cost-Effectiveness: While initial capping costs more than painting, lifetime costs favor capping significantly when you calculate repeated painting expenses over decades.
Thompson Creek window installations include professionally finished exterior trim, eliminating painting concerns entirely. When you invest in quality replacement windows, you shouldn’t have to worry about ongoing trim maintenance.
The Fourth P: Perfecting Your Finish
Once the final coat of paint is dry, the last step is to remove the painter’s tape around it and address any imperfections.
Tape Removal Technique
Pull the tape using an even stroke at a 45-degree angle away from the painted surface. Remove tape while paint is still slightly tacky (after 30 minutes to 1 hour) for the cleanest lines. Waiting until paint fully cures risks pulling off paint chips along with tape.
Tape remnants that don’t pull off easily can be removed using a utility knife. Score along the tape edge with light pressure, then peel away carefully.
Cleaning Paint Mistakes
If you notice any paint splattering on your window’s glass, no worries! Even completely dried, paint is easy to scrape off. Use a paint scraper or single-edge razor blade to chip off any paint in unwanted places.
Glass Cleaning Tips:
- Use sharp razor blade held at 45-degree angle
- Keep blade flat against glass to avoid scratching
- Work from outside in toward painted edge
- Wipe blade frequently to prevent paint buildup
- Clean glass with glass cleaner after scraping
Final Inspection and Touch-Ups
Inspect your work in good light from multiple angles:
- Check for missed spots or thin coverage
- Look for drips or sags requiring sanding and recoating
- Verify all edges are clean and straight
- Ensure no paint on glass or walls
Address issues promptly while you have materials on hand. Small touch-ups done well blend invisibly into the overall finish.
When Painting Isn’t Enough: Consider Window Replacement
If a new coat of paint isn’t enough to freshen up your windows, consider replacing them altogether. While painted trim can help your window’s overall appearance, it won’t do much for inoperable, drafty windows with failed seals, rotted frames, or outdated single-pane glass.
Signs It’s Time for Replacement
Operational Issues: Windows that stick, won’t stay open, or are difficult to operate won’t improve with fresh paint. Internal mechanisms have failed.
Drafts and Air Leakage: If you feel air movement around closed windows despite weatherstripping replacement, the window assembly has failed. Paint won’t fix this.
Condensation Between Panes: Foggy appearance indicates seal failure in insulated glass units. No amount of painting addresses this problem.
Rotted Wood: If your trim or frame has soft, crumbly, or discolored wood, rot has set in. Paint temporarily hides the problem but doesn’t stop deterioration. Structural damage requires replacement.
Energy Bills Climbing: Old, inefficient windows waste energy regardless of fresh paint. Modern ENERGY STAR® windows reduce heating and cooling costs by 20 to 40%.
Constant Maintenance: If you’re repainting trim every 2 to 3 years due to ongoing peeling and degradation, underlying moisture, or structural issues, window replacement is demanded.
Energy-efficient windows are a great investment for your home’s resale value and overall comfort. Understanding when to repair versus replace windows helps you make cost-effective decisions.
Frequently Asked Questions About Painting Window Trim
What type of paint is best for window trim?
For interior trim, use acrylic latex paint in a semi-gloss or gloss finish for durability and washability. For exterior trim, use 100% acrylic latex exterior paint specifically formulated for trim and doors. These paints resist moisture, UV damage, and temperature extremes better than general house paints.
How long does painted window trim last?
Interior painted trim lasts 5 to 10 years with normal wear before requiring repainting. Exterior painted trim typically needs repainting every 5 to 7 years depending on sun exposure, moisture, and climate. South- and west-facing trim degrades faster due to intense sun. Proper prep and quality materials extend these timespans.
Can I paint window trim without removing old paint?
Yes, if existing paint is well adhered without peeling, cracking, or bubbling. Thoroughly clean, lightly sand to dull the sheen, and paint over it. However, if old paint is failing, removal is essential for durable results. Painting over failing paint guarantees premature failure of the new coating.
Should I use primer on previously painted trim?
Not always. If repainting similar colors over sound existing paint, quality paint-and-primer-in-one products work well. Use a dedicated primer when painting bare wood, covering dark colors with light, or addressing stains that might bleed through top coats.
How do I avoid brush marks in paint?
Use quality brushes designed for the paint type (natural bristle for oil-based, synthetic for latex). Don’t overwork the paint with excessive brushing. Maintain a wet edge by working quickly enough that new paint blends into still-wet previous strokes. Consider using foam brushes for ultra-smooth finishes on small areas.
What’s the best way to paint window trim without getting paint on glass?
Use quality painter’s tape, pressed firmly along the edge. Alternatively, cut in carefully freehand with a good sash brush. Some painters intentionally paint slightly onto glass, then scrape it off after drying for perfectly straight lines. Practice improves freehand technique significantly.
Can I paint vinyl window trim?
Yes, but with caution. Use paint specifically formulated for vinyl (some manufacturers make vinyl-safe paints). Choose light colors (dark colors absorb heat, causing vinyl warping). Clean vinyl thoroughly before painting. Note that many vinyl windows feature maintenance-free colored frames that never need painting, eliminating this task entirely.
Why Thompson Creek Windows Eliminate Trim Painting Concerns
When you invest in Thompson Creek replacement windows, exterior trim maintenance becomes a non-issue. Our professional installations include:
Aluminum Trim Capping: Durable, maintenance-free aluminum capping over all exterior wood trim, eliminating painting requirements permanently.
Color-Matched Finishes: Trim capping matches window frame colors perfectly, creating a cohesive, professional appearance.
Factory-Applied Colors: Window frames feature baked-on color finishes that never fade, chip, or require painting. These aren’t paint; they’re integral to the vinyl material.
Complete Weather Protection: Proper capping and weatherization prevent moisture intrusion that causes rot, eliminating the deterioration that necessitates frequent painting.
Lifetime Value: While DIY painting costs $200 to $500 per house every 5 to 7 years, Thompson Creek’s maintenance-free solution eliminates these recurring expenses forever. Over 30 years, that’s $1,500 to $4,000 in avoided maintenance costs per house.
Professional Window Installation vs. DIY Painting
Smart homeowners recognize that time spent repeatedly painting trim could be invested in permanent solutions. Thompson Creek’s custom-manufactured windows deliver:
- Zero-maintenance exterior trim (capped aluminum)
- Zero maintenance frames (colored vinyl, never paint)
- Superior energy efficiency (ENERGY STAR® certified)
- 50-year No-Hassle Warranty (materials and labor)
- Professional installation (factory-trained crews)
- Custom manufacturing (perfect fit, maximum performance)
Call Thompson Creek today or visit our website for more information on how we can improve your windows and your home. Stop painting trim and start enjoying truly maintenance-free windows designed for Maryland, Virginia, D.C., Pennsylvania, and North Carolina climates.
Ready to eliminate window trim painting forever? Contact Thompson Creek for your free consultation. Discover how our custom-manufactured, maintenance-free windows end the painting cycle while improving energy efficiency, comfort, and home value.
Call (301) 901-5275 or request your free estimate online. Our window experts will show you maintenance-free solutions that save time, money, and ongoing effort.
Serving the Mid-Atlantic since 1980. Custom windows, professional installation, zero maintenance, exceptional value.