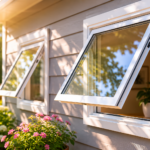
You’ve selected your custom replacement windows and scheduled your installation date with Thompson Creek. Now comes an important question: how do you prepare your home for window replacement? With proper preparation, your window installation can be completed in less than a day with minimal disruption to your home and family.
This comprehensive guide walks you through eight essential steps to prepare for window replacement day. Whether you’re upgrading to energy-efficient windows in Maryland, Virginia, or throughout the Mid-Atlantic region, these preparation tips will help ensure a smooth, professional installation experience with your new Thompson Creek windows.
1. Schedule a Pre-Installation Consultation
Before installation day arrives, connect with a Thompson Creek window expert to discuss your specific home preparation needs. Our consultants can walk you through the entire window replacement process, from understanding your custom window specifications to timeline expectations. This consultation helps you know exactly what to expect and allows you to ask questions about your unique home situation.
For homes with special considerations—such as historic architecture, multi-story installations, or unique window shapes—this pre-installation discussion is particularly valuable. Our team has over 40 years of experience installing custom windows throughout the Mid-Atlantic and can provide specific guidance for your home’s needs.
Pro tip: Keep our contact information handy for any last-minute questions that arise before installation day.
2. Clear Installation Work Areas (Inside and Outside)
Professional window installers need adequate workspace to safely and efficiently complete your installation. Clear a minimum of two to three feet around each window, both inside and outside your home. This clearance allows installers to maneuver equipment, remove old windows, and properly install your new custom-manufactured windows.
For specialty windows like bay and bow windows, you’ll need to provide additional space—typically four to five feet of clearance. These projection windows require extra room for proper installation and finishing work. If you’re unsure about space requirements for your specific window types, consult with your installer during the pre-installation walkthrough.
Outdoor preparation checklist:
- Trim shrubs and branches within three feet of windows
- Remove potted plants, outdoor furniture, or decorations near work areas
- Clear pathways from the driveway to each window location
- Ensure gate access is available for installers and equipment
- Remove or relocate garden hoses, children’s toys, or lawn decorations
Indoor preparation checklist:
- Move furniture at least three feet away from windows
- Roll up area rugs near window areas
- Remove window treatments, curtains, blinds, and valances
- Clear windowsills of plants, decorations, and personal items
- Take down nearby shelving units if they obstruct access
3. Protect Wall Hangings and Window Treatments
Window installation involves removing old windows and securing new ones, which creates vibrations throughout your walls. Protect your home decor by removing wall hangings, mirrors, and artwork within a six-foot radius of each window being replaced. Even securely mounted items can shift or fall during installation work.
Store removed items in a safe location away from the work area—preferably in a different room. If you have valuable or fragile artwork near windows, consider professional packing materials for added protection during your installation day.
Don’t forget to remove or secure:
- Picture frames and wall art
- Mirrors and decorative wall hangings
- Floating shelves within the work zone
- Wall-mounted televisions near windows
- Curtain rods and window treatment hardware
You’ll reinstall these items once your new energy-efficient windows are in place and you’re ready to enjoy improved home comfort and reduced energy bills.
4. Coordinate Home Security System Deactivation
If your home has a security system with window sensors, coordinate with your security provider well before installation day. Window and door sensors need to be professionally deactivated before old windows are removed to prevent false alarms that could result in emergency response fees or service disruptions.
Security system preparation timeline:
- 5-7 days before: Contact your security company to schedule deactivation
- Installation day morning: Confirm system is in “bypass” or “test” mode
- After installation: Schedule reactivation for the same day or next business day
Thompson Creek installers focus on window and door installation—not security system management. Your security provider should handle all sensor deactivation and reactivation to ensure your home protection remains intact. Many modern systems allow temporary zone bypassing, which keeps your overall system active while allowing window work to proceed.
Never leave your home security system deactivated longer than necessary. Schedule reactivation immediately after your window installation is complete to maintain your family’s safety and peace of mind.
5. Secure Loose Papers and Lightweight Items
During window removal, your home experiences brief periods when window openings are completely open to the outdoors. Even on calm days, air currents can move lightweight items near windows. Protect important documents, mail, and decorative items by moving them away from window areas.
Pay special attention to:
- Papers, bills, and documents on desks or tables near windows
- Lightweight curtains or sheer window treatments (remove these entirely)
- Table runners, placemats, or decorative fabrics
- Children’s artwork or school papers displayed near windows
- Potted plant leaves that might blow in the breeze
Place these items in drawers, closed cabinets, or rooms where no window work is happening. This simple step prevents loss of important papers and eliminates cleanup time after installation.
For homeowners working from home, consider relocating your workspace to a room without window installation scheduled. This allows you to maintain productivity while installation work proceeds uninterrupted in other areas.
6. Create Safe Zones for Children and Pets
Window installation involves professional tools, ladders, heavy materials, and temporary openings in your home. For family safety, establish clear boundaries that keep children and pets away from all work areas. The installation team needs unobstructed access, and curious family members can inadvertently create safety hazards.
Safety planning for installation day:
- Arrange childcare or plan activities in a separate area of your home
- Confine pets to a room far from installation activity (consider boarding for the day)
- Explain the installation process to older children and set clear boundaries
- Keep all family members at least 10 feet away from both interior and exterior work zones
- Inform installers about pets so doors can be kept closed
Installation equipment like reciprocating saws, drills, and pneumatic tools create noise that can frighten pets. The unfamiliar activity, combined with strangers in the home, can cause stress for animals. A quiet, secure room with water, food, and comfort items helps your pets stay calm during the installation process.
Many Thompson Creek customers find that scheduling installation during school hours or planning a day trip makes the process smoother for families with young children.
7. Discuss Furniture and Floor Protection
Professional window installers take precautions to protect your home, but you can enhance this protection by communicating your specific concerns beforehand. Thompson Creek installation teams use drop cloths, floor runners, and protective coverings as standard practice, but if you have particular flooring, furniture, or areas of concern, mention these during your pre-installation consultation.
Items warranting extra protection discussion:
- Hardwood floors in pristine condition or recently refinished
- Expensive area rugs that cannot be easily moved
- Heirloom furniture or antiques near windows
- Delicate floor tiles or stone surfaces
- Custom wall treatments or wallpaper
While our installers respect your home and take care to prevent damage, proactively covering or moving your most valuable items provides additional peace of mind. Consider using furniture sliders to easily move heavy pieces, or ask friends or family to help relocate items before installation day.
Most window replacement projects generate minimal dust or debris, but installations in older homes—particularly those with original windows from the 1970s or earlier—may produce more cleanup needs. Discuss this with your installer if you’re concerned about dust management, especially if family members have allergies or respiratory sensitivities.
8. Designate a Staging and Materials Area
Professional window installers arrive with custom-manufactured windows, installation materials, tools, and equipment that require temporary storage during your project. Work with your installation team to identify the best staging location that provides easy access while minimizing disruption to your property.
Ideal staging area characteristics:
- Level surface close to installation locations
- Protection from weather (covered porch or garage if possible)
- Sufficient space for materials and equipment (typically 10′ x 10′ minimum)
- Access to electrical outlets for power tools
- Clear path for moving materials to each window location
Many homeowners designate their driveway as the primary staging area, which works well for most installations. However, if your installation involves multiple window types or a large number of windows, you might need to provide additional space. Garages offer weather protection for materials, but ensure vehicle removal if the installer needs this space.
For multi-story homes, discuss ladder placement and roof access if applicable. Your installer may need to set up scaffolding or use extension ladders, which require secure, level ground and clearance from overhead wires or tree branches.
Understanding the Window Installation Timeline
With proper preparation, most window replacement projects complete in less than a day. However, project duration varies based on several factors:
- Number of windows: Single window replacements may take 1-2 hours; whole-home projects typically complete in 6-8 hours
- Window type and size: Standard double-hung windows install quickly; custom shapes or bay windows require additional time
- Home age and condition: Older homes may need frame repairs or adjustments
- Weather conditions: Mid-Atlantic weather can impact scheduling, particularly for multi-story installations
Thompson Creek provides realistic timeline estimates during your consultation, accounting for your specific home characteristics and the custom windows we’re manufacturing for your installation.
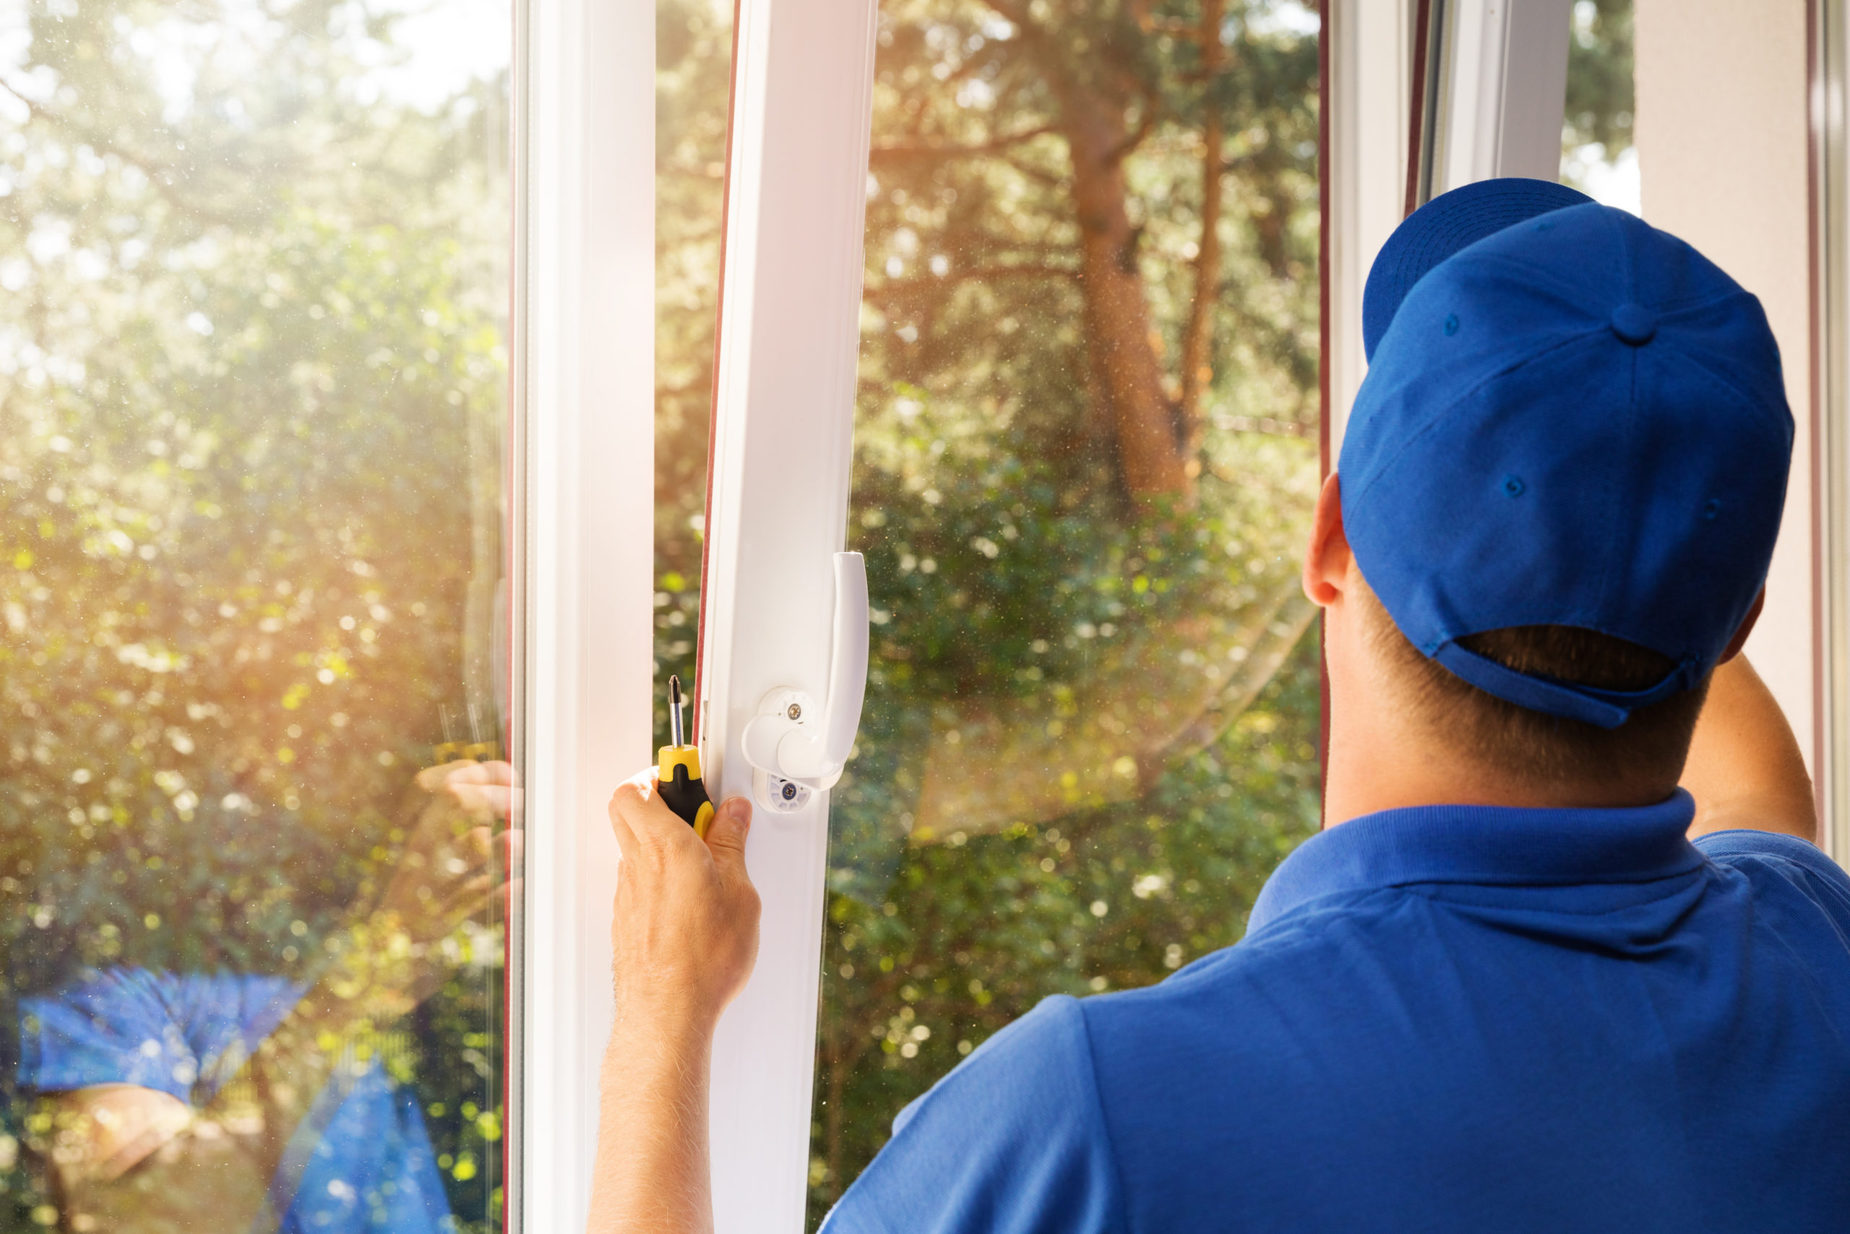
What to Expect on Installation Day
Understanding the installation process helps you prepare mentally and practically for the work ahead. Here’s a typical installation day timeline:
Morning arrival (8:00-9:00 AM): Installation team arrives, reviews work scope, and sets up staging area. Team performs final measurements and prepares the first window location.
Window removal (9:00 AM-12:00 PM): Old windows are carefully removed, openings are inspected, and any necessary frame adjustments are made. This is when proper preparation really shows value—clear work areas allow installers to work efficiently.
New window installation (12:00 PM-4:00 PM): Custom-manufactured windows are installed, leveled, insulated, and sealed. Each window receives quality checks to ensure proper operation and weatherproofing.
Final inspection and cleanup (4:00-5:00 PM): Installation team performs final adjustments, cleans work areas, removes old windows and debris, and walks you through operating your new windows.
Throughout the day, installers maintain respectful communication and work to minimize disruption to your household. Most homeowners are surprised at how quickly the process moves and how little mess remains after professional installation.
Frequently Asked Questions About Window Replacement Preparation
How long does window replacement take? Most single-window replacements complete in 1-2 hours, while whole-home projects typically finish within one day. Thompson Creek’s efficient installation process, combined with our custom-manufactured windows built specifically for your home’s exact specifications, ensures a smooth experience from start to finish.
Will my home be exposed to weather during installation? Yes, briefly. Each window is removed and replaced individually, so only one opening is exposed at a time—typically for 30-60 minutes per window. Installers work quickly and monitor weather conditions to protect your home.
Can I stay home during window installation? Absolutely. Many homeowners remain home during installation, though you’ll need to stay clear of work areas. Some customers prefer to schedule installation when they can be away from home for the day, particularly if they have young children or pets.
Do I need to take time off work for window installation? This depends on your preference and home situation. If you trust the installation team and have secured pets and valuables, you may not need to be home. However, many customers appreciate being present for the final walkthrough and to ask questions about operating their new energy-efficient windows.
What happens if weather delays my installation? Thompson Creek monitors weather forecasts closely and will proactively reschedule if conditions aren’t suitable for window installation. Mid-Atlantic weather can be unpredictable, particularly during spring and fall. We prioritize quality installation over rushing work in poor conditions.
Can I replace windows myself or should I hire professionals? While skilled DIYers may be capable of window installation, professional installation ensures proper measurements, correct installation techniques, and warranty protection. Thompson Creek’s 50-year No-Hassle Warranty covers both products and professional installation, providing peace of mind that DIY projects cannot match.
Preparing for Mid-Atlantic Weather Conditions
The Mid-Atlantic region experiences diverse weather conditions that impact window performance and installation timing. Thompson Creek manufactures windows specifically designed to withstand regional climate extremes—from humid summers to harsh winter conditions and occasional hurricane-force winds.
Our windows are laboratory-tested to withstand the weather conditions of the Mid-Atlantic region, providing crucial protection during severe weather events. This weather resistance starts with proper installation, which is why preparation becomes even more critical for Mid-Atlantic homeowners.
Seasonal preparation considerations:
Summer installations: Ensure adequate cooling in installation areas, as your home will be briefly exposed to heat and humidity. Prepare for potential afternoon thunderstorms by discussing backup dates with your installer.
Winter installations: While Thompson Creek installs windows year-round, winter projects require extra attention to heat loss during installation. Close doors to rooms not being worked on to maintain home temperature. Learn more about best windows for cold weather.
Hurricane season: If you’re installing storm-resistant windows during hurricane season, discuss expedited timelines if weather forecasts show concerning patterns. Our weather-tested windows provide exceptional protection once installed.
Understanding Window Replacement Costs
Before beginning your window replacement project, it’s helpful to understand what factors affect window replacement costs. Thompson Creek provides transparent pricing during your free consultation, with no hidden fees or middleman markup since we manufacture and install our own products.
Several factors influence the total investment:
- Window materials (vinyl offers excellent energy efficiency and low maintenance)
- Window size and style (specialty windows like bay or bow require more materials)
- Glass package options (double-pane, triple-pane, or Sound Shield™)
- Custom features (colors, grids, hardware choices)
- Number of windows being replaced
When you get a quote for replacement windows, Thompson Creek provides detailed pricing that accounts for your specific needs, with no obligation to proceed.
Recognizing When Window Replacement Is Needed
If you’re preparing for window replacement, you’ve likely already noticed signs that your windows need replacement. Common indicators include:
- Drafts around closed windows
- Difficulty opening or closing windows
- Condensation between window panes
- Rising energy bills
- Visible damage or deterioration
Thompson Creek’s energy-efficient windows address all these issues, with our custom-manufactured windows designed specifically for your home’s openings and the Mid-Atlantic climate.
Choosing the Right Windows for Your Home
Not all replacement windows offer the same benefits. Thompson Creek helps homeowners understand how to tell if windows are energy efficient and choose the best energy-efficient windows for their specific needs.
Our windows exceed 2023 ENERGY STAR® criteria for the Mid-Atlantic climate zone, which can help you save up to 20 percent in heating and cooling costs according to ENERGY STAR guidelines. We offer multiple glass package options, including:
- Double-pane insulated glass
- Triple-pane for maximum efficiency
- Sound Shield™ for noise reduction
- Low-E coatings to reduce UV damage
Each option is custom-built in our Maryland facility to your home’s exact specifications.
Special Considerations for Historic Homes
If you own a historic property, you may face unique challenges when planning window replacement. Our guide on window replacement vs. restoration for historic homes provides valuable insights for preserving architectural character while improving energy efficiency.
Thompson Creek can create custom windows that match historic profiles while incorporating modern performance features, allowing you to maintain your home’s authenticity without sacrificing comfort or efficiency.
Why Choose Thompson Creek for Your Window Replacement
When you invest in window replacement, you’re not just buying windows—you’re investing in decades of improved comfort, energy savings, and home value. Thompson Creek delivers complete accountability from design through warranty service, with every window custom-manufactured in our Maryland facility specifically for your home.
Our 50-year No-Hassle Warranty covers both products and professional installation, giving you peace of mind that extends far beyond installation day. As a family-owned company serving the Mid-Atlantic since 1980, we understand regional climate challenges and build windows that exceed ENERGY STAR® criteria for lasting efficiency. You won’t find middleman markups or split responsibility—we design it, build it, install it, and guarantee it.
Ready to upgrade to custom-manufactured windows built for Mid-Atlantic weather? Schedule your free in-home consultation today and discover why homeowners throughout Maryland, Virginia, Washington D.C., and Pennsylvania have trusted Thompson Creek for over 40 years. Our windows come with industry-leading warranties and professional installation you can count on—backed by our complete accountability from manufacturing through service.