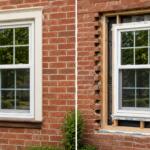
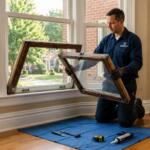
Replacing your windows can feel like a big project, especially if you’ve never watched the process up close. The good news is that a professional replacement window installation follows a clear, repeatable sequence that protects your home and delivers a tighter, cleaner fit than most DIY attempts.
It also matters in a measurable way. Heat gain and heat loss through windows account for about 25%–30% of residential heating and cooling energy use, according to the U.S. Department of Energy. That’s why correct installation and proper sealing are just as important as the window itself.
At Thompson Creek, we build custom-manufactured replacement windows in Maryland and install them with trained teams who handle the details from measurement through warranty service. This walkthrough explains how replacement windows are installed, what to expect, and what to watch for in the Mid-Atlantic’s changing weather.
First, Measure for the Replacement Window
Accurate measurement is the foundation of a smooth installation. Even small errors can lead to gaps, sticking sashes, or trim work that never looks quite right. For replacement windows, measurements typically focus on the existing opening and how the new unit will fit inside it.
Professional measuring usually includes:
- Width measurements at the top, middle, and bottom of the opening
- Height measurements at the left, center, and right
- Checks for squareness and level
- Notes on wall depth and interior trim details
- Inspection for moisture damage or soft wood around the frame
This step also helps determine which installation approach makes the most sense.
Pocket installation vs full-frame installation
Not every replacement is the same. Many homes can use a pocket installation that sets a new window into an existing, sound frame. If the original frame is damaged, out of square, or has hidden rot, a full-frame replacement may be the safer long-term option because it replaces the entire unit down to the rough opening.
If you’re planning to measure yourself, Thompson Creek shares the key steps in measuring for replacement windows so you know what the pros are looking for.
Removing the Old Window
Window removal varies by style and age, but the goal is always the same: remove the old unit without damaging the surrounding structure.
In many homes, the removal process includes:
- Protecting floors and nearby furniture
- Removing sashes, stops, and interior trim as needed
- Detaching fasteners holding the old unit in place
- Lifting out the old window and cleaning the opening
- Inspecting the sill and frame area for rot, mold, or water staining
Older homes sometimes have surprises behind the trim—hidden gaps, deteriorated wood, or previous repairs that need to be corrected before the new window goes in. If the opening isn’t solid and stable, even a great window can underperform.
If your home is older or has original windows, this can be a helpful read replacement windows for older homes.
Installing the Replacement Window
This is where precision matters most. A professional installation is designed to create a tight fit, a reliable seal, and smooth operation.
While exact steps vary by window type and opening condition, the core sequence often looks like this:
1) Prepare the opening
Installers remove debris, confirm the surface is sound, and address minor repairs. For full-frame work, this may include repairing framing and ensuring the rough opening is ready for proper flashing and sealing.
If you want to understand what a rough opening is and why it matters, Thompson Creek breaks it down in rough openings explained.
2) Set the window level and square
The new unit is placed into the opening and adjusted with shims so it sits level, square, and plumb. This step directly affects how the window locks, slides, and seals.
3) Fasten and seal
Once aligned, the window is fastened according to manufacturer requirements and installation best practices. Pros focus on controlled fastening that keeps the frame true.
Then comes the critical performance work:
- Air sealing to reduce drafts
- Moisture management to help prevent water intrusion
- Insulation around the perimeter where appropriate
- Exterior sealing details that match the home’s cladding
Industry standards exist for window installation practices in residential and light commercial settings, including ASTM guidance for installing windows and doors.
4) Insulate and finish
After the unit is secured and sealed, installers typically insulate gaps around the frame (when needed), reinstall interior trim, and finish the exterior details so the window looks clean and performs as intended.
5) Test operation and perform a final check
A good installer checks that the window opens, closes, locks, and seals correctly. They also confirm sightlines, gaps, and trim alignment.
If you’re worried about getting a “good install,” this is a smart checklist signs of poor window installation.
What to Expect on Installation Day
Most homeowners care about two things on install day: how disruptive it will be and how confident they can feel when the crew leaves.
A professional replacement window appointment typically includes:
- A brief walkthrough before work starts
- Protection for floors, walkways, and nearby furniture
- Removal and installation done one opening at a time to limit exposure
- Clean-up as the job progresses
- Final inspection and basic operation review
How long does it take
Many homes can have multiple windows installed in a single day. Larger projects or homes with more complex openings may take more than one day, especially if repairs are needed once the old windows come out. (That’s normal and often a sign the installer is doing the job correctly rather than covering up issues.)
To make install day smoother, Thompson Creek shares practical prep steps for homeowners preparing your home for window replacement.
Mid-Atlantic Considerations That Affect Installation
Maryland, Northern Virginia, and DC see humid summers, cold snaps, heavy rain, and strong wind events. Those conditions put extra pressure on the building envelope around windows.
A Mid-Atlantic-smart installation pays close attention to:
- Water management at the sill and perimeter
- Sealing details that handle seasonal expansion and contraction
- Draft control for winter comfort
- Fit and fastening that supports long-term performance in wind and storms
Energy-efficient choices matter, too. ENERGY STAR® explains that certified windows are independently certified and verified to meet energy-efficiency guidelines, and selection should match your climate zone.
Thompson Creek also tests window performance, including wind resistance, as part of product design. If you want the bigger picture of what happens before, during, and after the install, this page covers the full experience what to expect during a window project.
Simple Comparison Pocket vs Full-Frame Replacement
Pocket installation can be a good fit when
- The existing frame is solid and square
- You want minimal disruption to interior trim
- There’s no sign of water damage around the window
Full-frame replacement is often the better choice when
- The frame has rot, water staining, or softness
- The opening is out of square
- You want to change the window size or style
- You’re correcting past installation issues
If you’re trying to decide whether to repair or replace, this breakdown is helpful window repair vs replacement.
FAQ Replacement Window Installation
Can I install replacement windows myself?
Some skilled homeowners can handle a straightforward replacement, but window installation is less forgiving than it looks. Accurate measurement, controlled fastening, and correct sealing are key to avoiding drafts and leaks. Thompson Creek shares the real tradeoffs installing replacement windows yourself.
Do new windows lower energy use?
Replacing old windows and improving air sealing can reduce heating and cooling loss. The U.S. Department of Energy notes that windows are a major source of heat gain and loss, and choosing efficient windows that fit your climate can improve comfort and reduce wasted energy.
What should I ask before scheduling window replacement?
Good questions cover installation approach, warranty coverage, product certification, timeline expectations, and how problems are handled after install. Here’s a practical list questions to ask about replacement windows.
How do I know it’s time to replace my windows?
Common signs include drafts, condensation between panes, difficulty opening or locking, and visible damage to frames or sashes. Thompson Creek outlines the most common indicators signs you need window replacement.
Should I replace all my windows at once?
Some homeowners replace windows in phases; others prefer one project for consistent appearance and efficiency. Budget, home condition, and scheduling all play a role. This can help you decide replacing all windows at once.
Why Choose Thompson Creek for Replacement Window Installation
Thompson Creek delivers a simpler, more accountable experience because we handle the entire process in-house—design, build, install, and service. Our replacement windows are custom-manufactured in Maryland, ENERGY STAR® certified, and backed by a 50-year No-Hassle Warranty. With Mid-Atlantic expertise and professional installation, you get windows that fit right, perform well, and stay supported long after installation day.
Ready to upgrade your home? Schedule your free consultation today and discover why Mid-Atlantic homeowners have trusted Thompson Creek for over 40 years. Our custom-manufactured windows and doors come with a 50-year warranty and professional installation you can count on.